An easy way to share your computer is to use a dedicated guest account. They can have their own place without access to your personal content. We’ll show you how to create a guest account in Windows 11 or Windows 10.
Unfortunately, creating a guest account in Windows is not as easy as it was before. To get rid of this, we can adopt two methods. Both methods will create password-free local accounts that can be used by anyone. We’ll show you that each method works.
How to create a guest account using Windows 11 Settings
1. Open Settings using keyboard shortcut ‘Win+I’.
2. Click on Accounts.
3. Click on the Family & other users page on the right side.
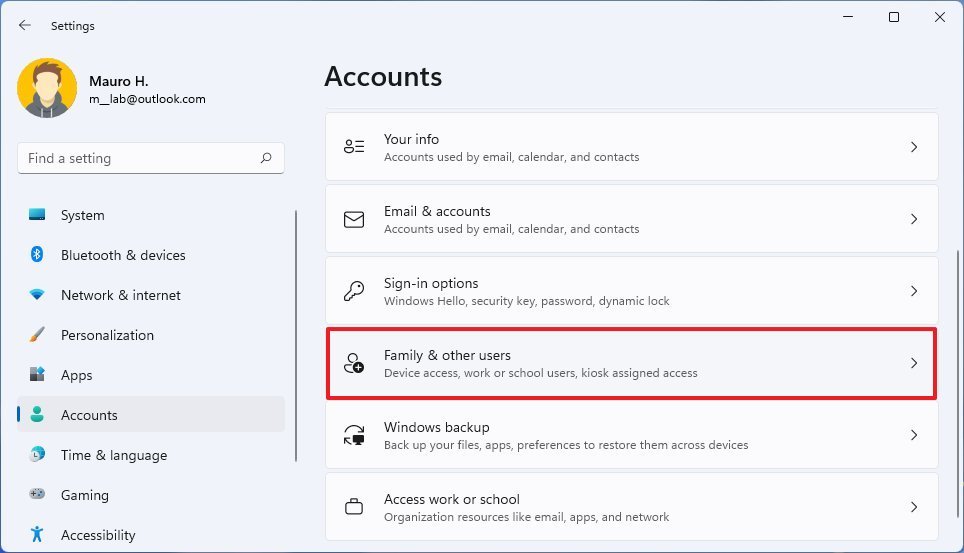
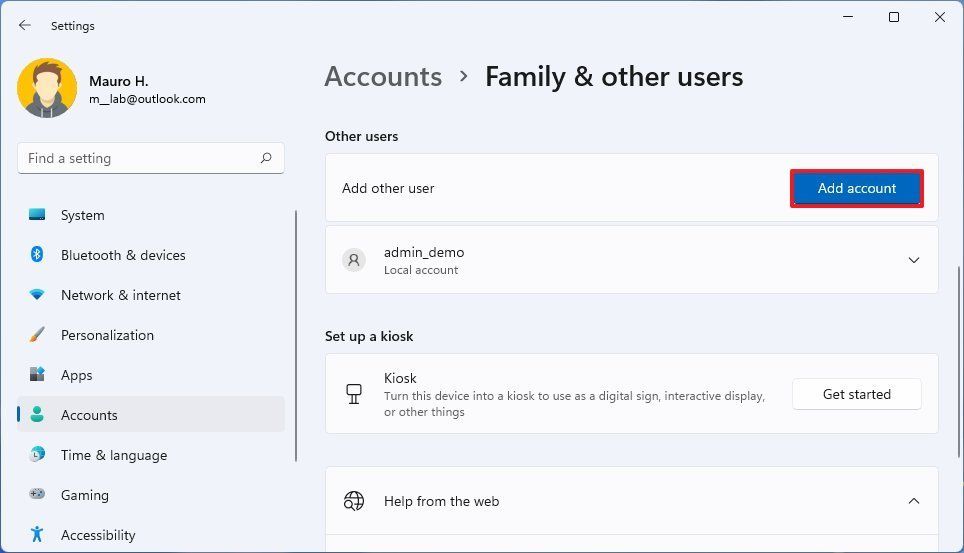
4. Under the “Other users” section, click on Add account to create a new user account.
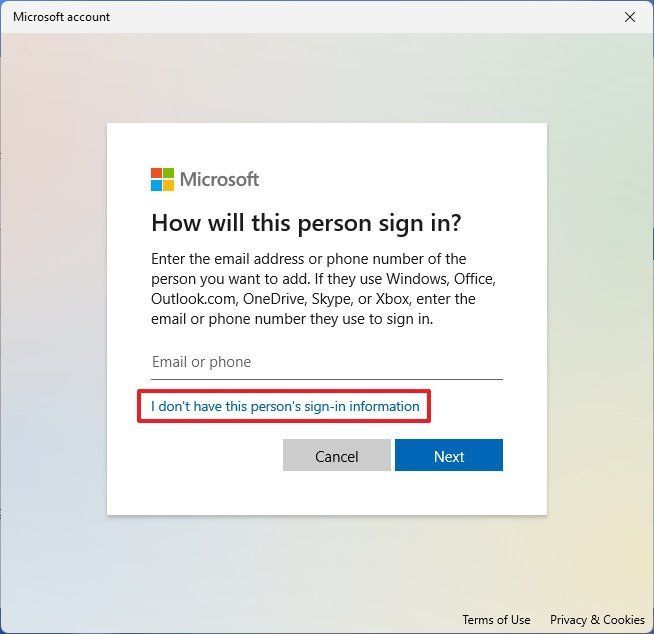
5. Click on I don’t have this person’s sign-in information option.
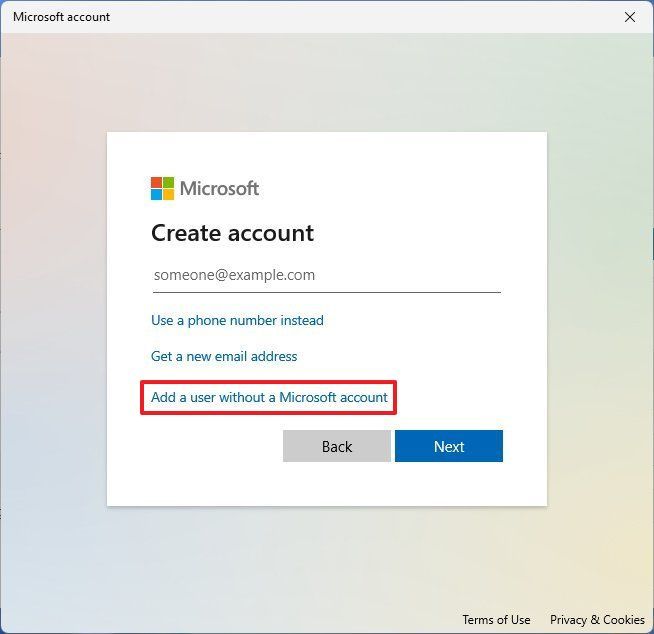
6. From the next page, Click on Add a user without a Microsoft account option.
7. You should now set up a username, password, and three security questions for the guest account.
Note: that you cannot use “guest” as a username as it is reserved in the OS. Click “Next”, and you now have a second account in Windows 11.
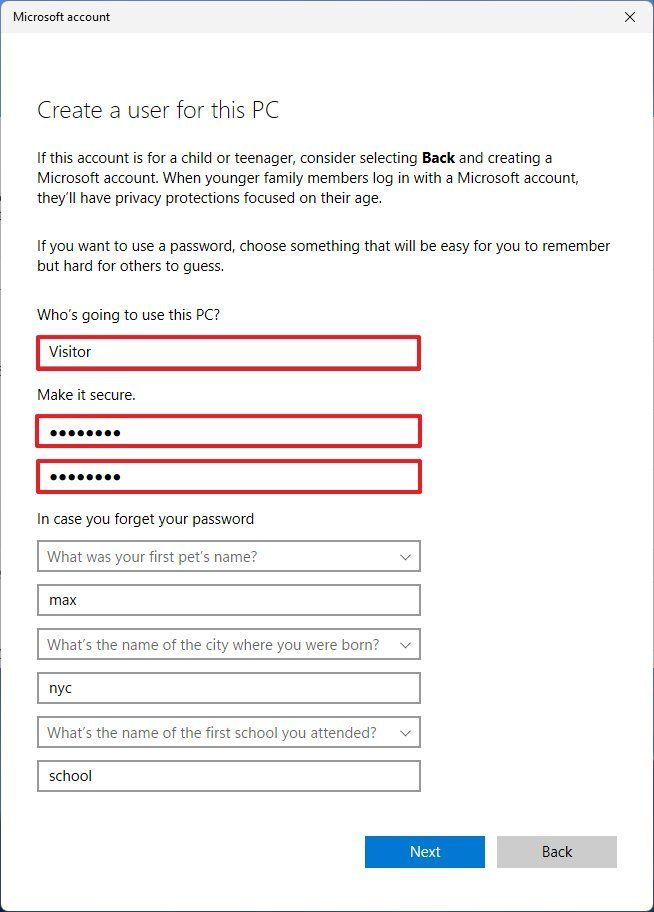
Once you complete the steps, a restricted standard account will be created for sharing computers with your house guests. The last thing left to do is to sign out and sign in with the new guest created account.
How to Add account to the Guest user group in Windows 11
1. Open Start.
2. Search and Open Computer Management as an administrator.
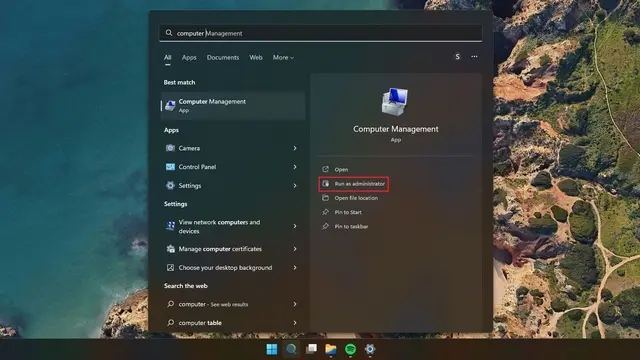
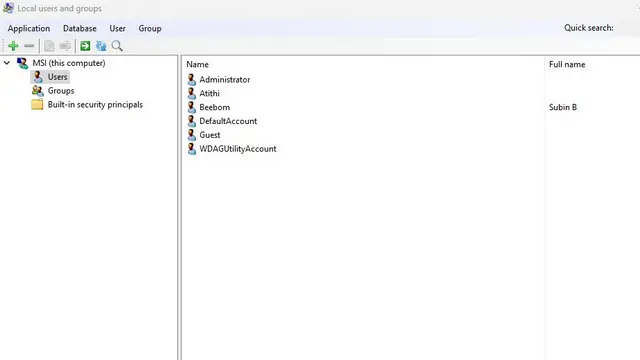
3. Navigate to the following path: System Tools > Local Users and Groups > Users. Notably, if you are on the Home edition of Windows 11 you will not find the “Local Users and Groups” option. As a workaround, you can install and use the local user and group management tool from GitHub. To get started, double-click on the user you just created.
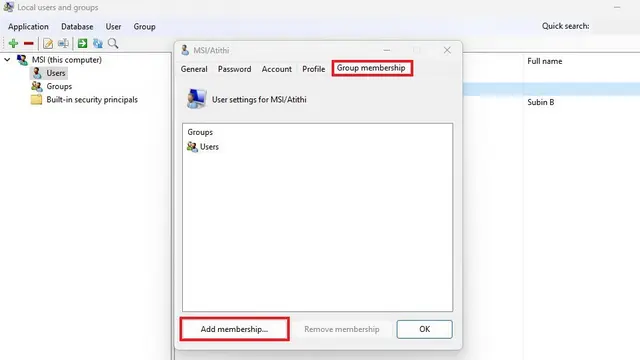
4. Switch to the “Group Membership” tab and select “Add Membership” to select the Guest Users group.
5. Select “Guests” from the list of groups and click “Select” to confirm the selection.
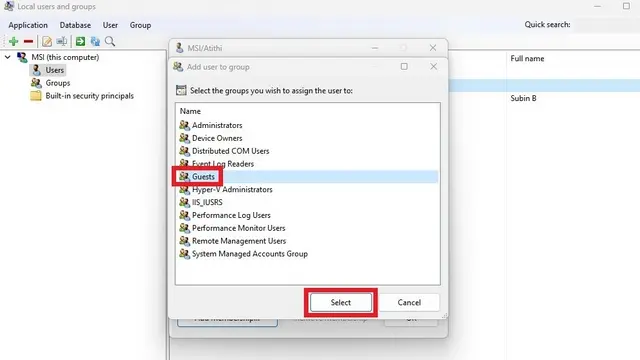
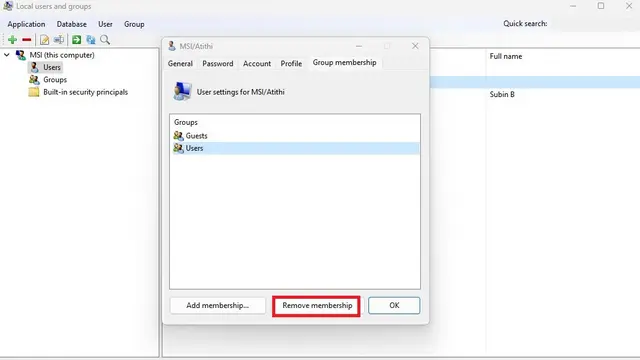
6. After adding the Guest Users group, click “Users” and press the “Remove membership” button. You have successfully created a new guest account in Windows 11.
How to create a guest account using Command Prompt in Windows 11
1. Search for “Command Prompt” in Windows Search and select run it as administrator.
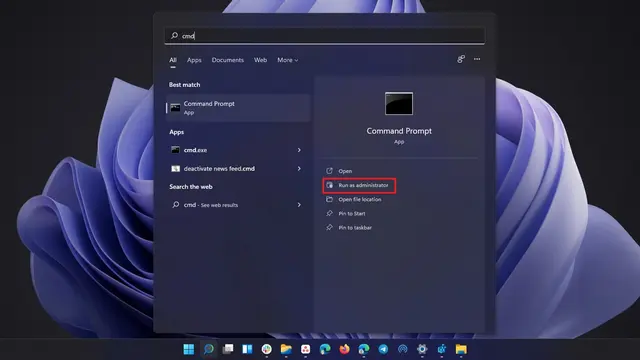
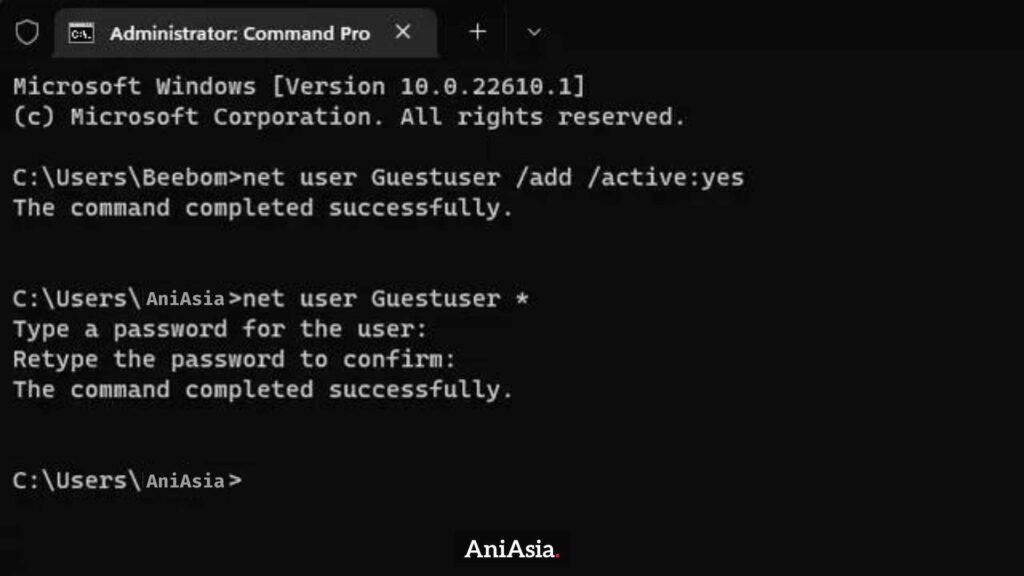
2. Type the following command to create a new guest account. Note: that you can replace “guestuser” in the command with the name of your choice.
net user Guestuser /add /active:yes
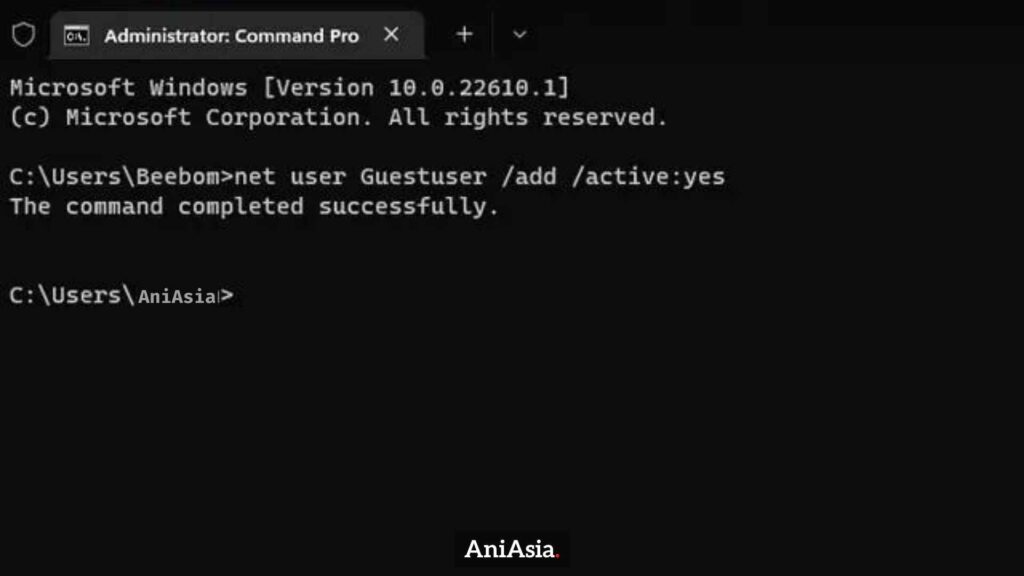
3. Use below command to set password for guest account. And that’s it, you have created a new guest account in Windows 11 using Command Prompt.
net user Guestuser *
These steps are for setting up an account to temporarily share a device with visitors. If you want to share a device with more users, it is recommended to create a standard account for each user with a offline Microsoft account or an Microsoft account .

